Chevy Impala SS Forum banner

Energy Suspension body mounts kit review: not recommended

6K views 24 replies 13 participants last post by  91ss  
#1 ·
Short version: The bushings, the website and the box all are very…shiny. But, ES provides no meaningful technical info, and the thrown-together kit has flawed fit and harsh ride. I wish I knew where to get a comprehensive rubber set, or a polyurethane solution with better engineering and more sensible hardness than the ES kit.

Long version:
Image


Image


Disorganized kit, with half a piece of paper
Wow. Kit is literally thrown together: 42 loose parts (30 bushings, 12 washers) tossed in a box with no packing list. The people filling the boxes have packing lists, so why not put one in the kit? You must look at each part one by one to see what goes where and if the box has the right parts or is missing anything. To do this, ES provides a summary of part numbers for each mount location, a tiny sketch, and brief instructions, all squeezed onto a HALF sheet of paper. No kidding—they use one piece of paper to print two sets of instructions, then cut it in half.
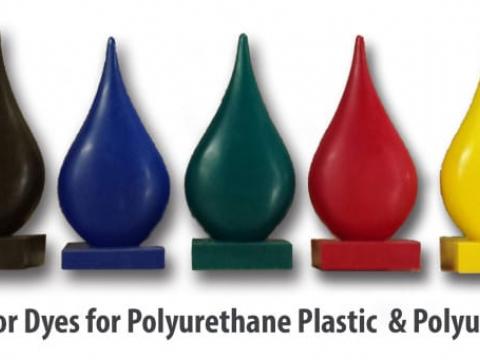
Meaningless colors
Red vs black when ordering: who gives a damn? They’re body bushings, for Pete’s sake. On the original bushings, painted color means something, but here it's just a useless marketing ploy. No, the black doesn't mean graphite-impregnated. By the way, ES also sells red covers for your torn tie rod end boots so you can show off your worn-out steering.

No tech info
Online catalog: no tech info on polyurethane, no durometer numbers at all (or what scale they use). I guess they use the same material for lots of things. No list of each kit’s contents, so maybe the so-called “9C1/taxi” kit is exactly the same as the regular B-body kit just with nothing missing? Neither one lists Fleetwood as an application, even though the basic set-up is the same as B-body with maybe some minor diffs in stock bushing firmness. With 194K, my original bushings have seen better days, so I tried the 9C1/taxi kit. The molded-in part numbers help with installation but make me wonder how many different applications ES is trying to cover with a given piece? Catalog doesn't list contents of each kit, so you can't figure out what they're really doing.

Installation
Flawed fit. The ID fits the stock metal inserts, the OD of the protruding metal-ringed part of the uppers fits the frame mounting holes, and the bushing ODs are okay, but the heights are wrong. The ES bushings are thinner than stock, so some of the funnel-shaped metal inserts are now too long to tighten the bushings down. Of course, other people already mentioned the same problem on B-bodies. So, I had to test-assemble each position and if too long get up off the floor, take it apart, clamp it in a bench vise, hacksaw off the excess, deburr it, re-assemble to check, then crawl back under the car. Over and over.
Image

Minor observation (no complaint, just FYI): ES position numbering 1-8 is different than GM’s 1-7 (GM doesn’t count the very front pair as #1).

Forward ones don’t seem useful
The bushings forward of the battery/PCM seem cobbled together. The gap in their sandwich is frame thickness, not for the thin sheet-metal where they go. There’s no real load on these anyway, just the front tip of the fender. Even if the intent was to leave some play to deal with frame flex at the front corners, the ES design still wouldn’t work well since it isn’t great at keeping itself centered in the sheet-metal hole. And, you still have to tighten the bolts, double-check the door-fender clearance and tweak the shimming in the bushing stack.

No torque information
Nothing in ES instructions. Shop manual says 55 but that assumes stock bushings and dry bolts. After reading various things about compensating for anti-seize compound, I settled on 35 pounds.

They’re very hard
I started in the front, and I’m glad I only did the front half. On poor surfaces the front is quite harsh now, even with soft FE1 springs, regular Bilsteins, and 18” wheels with comfortable touring tires with plenty of tread. The body moves around less but the NVH price is high because the bushings are thin and hard.
 
#2 ·
First off, taxi/9C1 bushings are made of much harder material. These product suppliers often provide items to experienced mechanics/body shops and recommend professional installation to inexperienced ones. Installing front to back is a big no-no. Unclear who told you to do that. Body bushings are installed one side at a time. The factory service manual goes into great detail regarding body mounts, and their installation. There are literally hundreds, if not thousands of us who successfully installed these kits without issue, and are well pleased with them. Yes, the 9C1 kit is likely to provide a harsher ride. The main reason myself/others ordered/installed the "softer" kit.
 
  • Like
Reactions: Norcal Industries
#3 ·
From the ES FAQ page: (short version, black ones have graphite in them to minimize squeeking)

What is the difference between the red and black bushings?
Quote From Energy Suspension's Official Website:
"Both are our Energy's HYPER-FLEX™ performance polyurethane formulations. Energy has impregnated selected black polyurethane components with graphite — to add a lubrication property. Additionally, both Energy Suspension® red and black polyurethane components are engineered differently than OEM rubber components — to be free a floating and non-binding design. This allows for the additional durometer (firmness) of the components, which adds to the performance improvement of the vehicle overall.
 
#5 ·
didn't say there was, just posting what ES says. Yeah "selected"...IDK how one would know unless the particular part said so.

FWIW when I did but the various colored ones, OEM, back when Dal had them available...they were all in separate bags relative to color but no instructions. I followed the FSM body mount procedure; I side at a time. Used a floor jack in parking lot at Pomona Dragstrip between rounds.

FWIW Rock Auto lists 2 ES bushing types. The one you got according to their 411 is not as firm as their 34145G set

ENERGY SUSPENSION 34145G Body Mount Set; Performance Polyurethane Info
Recommend Firmer Durometer Set PN[3.4136G/R]

ENERGY SUSPENSION 34136G Body Mount Set; Performance Polyurethane

More Information for ENERGY SUSPENSION 34136G (rockauto.com)
More Information for ENERGY SUSPENSION 34145G (rockauto.com)
 
#6 ·
First off, taxi/9C1 bushings are made of much harder material.
There is no specific info in the ES catalog about differences in hardness. The only apparent difference is the two pics, where the taxi/9C1 kit has more pieces in it, which makes me think it's the same kit just with the "missing" bushings, especially given the tossed-together look of the kit and the vagueness of the whole ES catalog.

From the point of view of production, packaging line, stocking, and service work, using different compounds to make the same bushings with no way to see the differences is unworkable, thus the OEM bushings had colors on them so everyone would tell the difference. ES doesn't do that, they just imply there's a difference. Kinda like they say "selected' black bushings are graphite-impregnated, but don't tell us which ones.

I aim to find out the truth, though, by ordering a regular kit and measuring for any difference in hardness.

Installing front to back is a big no-no.
My bad--I didn't word that very well. I followed the service manual,disconnected the various things that would interfere with raising the body, loosened all bolts, then jacked one side at a time, replaced bushings one side at a time by starting at the front one. Stopped after midway on each side.
 
#7 ·
Hi, sorry this is such a PITA at this day in age.
Not clear is the kit upper and lower, or just the lower bushings ?
Back in the day i got the lowers from DAL and did it with the car on the ground in like 1-2 hours. Never did the uppers and sold car with over 300K on it.

From you detailed posts i assume you read this already


-ALF out...
 
#8 ·
General comment about plastic and polyurethane color.

Color is not useful to identify hardness or flexibility.
It is a low percent additive. I seem to remember in plastic it is usually 1% but could be up to 5%
The polyurethane is much the same with some manufactures using 3%

Many cheap plastic parts are black because 0.5%-1% will result in black even if the raw material was many other colors.
Adding color to plastic or polyurethane also prevents easy inspection for air pockets, and in the case of plastic can hide poor plastic flow in the molding process.

Any manufacture can say they have added graphite. The question is what % actually would stop squeaks and would this change the properties and lifespan of a polyurethane part?

 
#10 ·
Counter Point:

ES kit is functionally better than the nearly 300k mi mounts I replaced last month.

The kit was just that, a kit, self contained and I didn't have to spend a ton of time to gather NOS stuff. Couple hundred bucks at summit and I'm off and running.

Was care required to trim metal sleeves - yes.

Could the instructions be better - yes.

Is my NHV worse - No. However my originals were so bad that the body was physically contacting the frame at the trans and rear spring cross members.

-Brian
 
#21 ·
Counter Point:

ES kit is functionally better than the nearly 300k mi mounts I replaced last month.

The kit was just that, a kit, self contained and I didn't have to spend a ton of time to gather NOS stuff. Couple hundred bucks at summit and I'm off and running.

Was care required to trim metal sleeves - yes.

Could the instructions be better - yes.

Is my NHV worse - No. However my originals were so bad that the body was physically contacting the frame at the trans and rear spring cross members.

-Brian
The front mount has a bolt and nut. Are all the other mounts the same way and if so how did you get to the top side to get a wrench on the nut? Or does the bolts screw into the body?
 
#12 ·
Probably why they continue offering two different sets, huh.
 
#13 ·
Now I am concerned I didn't trim the sleeves? Everything seemed normal on install?
 
#14 ·
First I've heard about trimming sleeves. I'm not worried about it.
 
#16 ·
I found the description on rock auto misleading. I selected 95 impala and it gave the two options for ES bushing. The softer ones give a diaclaimer " firmer durometer recomended" or something like that. It gave me the impression that the softer one was recomended. Once I looked into it, it made sense.
I'm happy with the bushings. That being said, I did not drive the car much before the bushings went in. I purchased the car in winter with a blown tranny (no reverse), so that winter is when the bushings went in.
 
#17 ·
If I recall correctly didn't one kit not come with the missing lowers that are on the impala? So it should really only be one option for us to choose from but I could be wrong its been sometime.

Didn't feel a change in nvh but at the time my car was lowered so nvh was already higher than normal. The biggest difference I felt is the body being tied down to the frame instead of swaying like it did before bumps. So unless the car already had the front missing lowers the change should make a positive ride impact imo.


#18 ·
I made a post years ago when I installed my ES kit about the sleeve insert height issue. I think the biggest problem is out of many B bodies I have taken apart, I have seen different sleeves used in the same positions, mix and matched, some used all of the shorter style and some used all of the longer style etc.... I think it didn't matter to GM because they were ok with the body 'floating' on the chassis. ES didn't take any steps to clarify what the proper sleeve height should be and that greatly affects the preload on the bushings as you noticed.

I determined by cutting all my longer style sleeves down to the shorter style (sorry, I just don't really exactly what height that was....don't hold me to it but I believe the taller ones were 2.0 and I cut them down to 1.7 but I could be off on that) the bushings then received some preload to a point where the lower shell appeared to be compressed properly. When trying to determine how much that preload should be, ES was zero help

IMO though, the proper installation of these bushings require the spacers to be cut in this way so that the bolts bottom out on the sleeves and can be torqued and the bushings 'crush' with preload but aren't overly crushed as the bolt bottoming out on the sleeve prevents that. The reason for this is so the chassis doesn't float on the bushings. IT likely makes for a harsher ride BUT remember the whole point of this mod is to help tie the chassis to the body. The chassis on these cars is a wet noodle, bracing it to the body IMO goes a long way to help make the whole assembly more rigid.

I definitely agree the kit sucks from the standpoint of it being a trouble free/comprehensive, but I'm used to that with these cars as many things big companies offer for our cars weren't really specifically designed for them and are just kits cobbled together with parts from other, more popular cars that just happen to work with our cars. I've found the same issues with many suspension parts like tubular A arms where bump stops are in the wrong place/wrong height and steering stops don't work because the arms really weren't made for B bodies.

As far as the harshness goes though, i'm sure if you drive a rubber car vs a poly car back to back the poly would feel harsher but I have no complaints with my car. It feels the way I want it to feel, very connected. With my speed tech coil over suspension I have taken many people for rides and nobody has ever complained about the harshness. In fact all I ever get from people is them talking about how much more comfortable the car feels than their own cars. My tuner who regularly beats on CTSV's told me the car felt like a really fast, really comfortable couch that handles great.
If you're looking for a very soft, floaty factory feel I'd stay away but most guys using them are looking to upgrade the performance of the car in general and these do serve a purpose there, despite transferring a little more road feel.
 
#19 ·
The other thing I didn't like is the flat style washers on the ES kit. Obviously a cost savings thing, but since the washer isn't integrated into the bushing it really should have been a cupped washer so the bushing shell doesn't just squish around under the washer all haphazardly as you tighten the bolt and apply preload.
 
  • Like
Reactions: 95wagon
#22 ·
The nuts are captive. No access, and problems if they are rusty and end up spinning. Never ran into myself, but suggest an impact wrench on a softer setting to help break the bolts free if so. Also, the mount above the axle has no bolt, it just pops into the frame.
 
#23 ·
I got very lucky and only had to make an access hole in the trunk for the very last captive nut on the driver's side. Again I also have nearly 300k mi on a Midwest daily driver.

Highly recommend against an impact. I've found that my 30" 1/2 drive breaker bar allows for enough torque to get things moving without the instant apply that tends to snap things off. Some of the removed bolts were less than half the normal diameter between the threads and the head, and a few I did have to resort to grabbing the remaining stub with vise grips.

No good photos of the bolts but the one on the right is supposed to look like the one on the left. The rest of it turned to dust.

Image


-Brian
 
#25 ·
Why I said "impact wrench on a softer setting" You need to have a gentle finger to throttle it.
NOT just pulling the trigger full blast like a mad man lol: "instant apply that tends to snap things off "
The shocking helps free things up.