Chevy Impala SS Forum banner

Can't get the oil filter adapter off.

9.4K views 25 replies 17 participants last post by  Mendonmafia  
#1 ·
I removed the filter, the 15 mm oil line bolt, and the 2 allen head bolts. It won't budge, do I need to it with a hammer? I tryed to
pry it off also. Am I missing something?

Mike
 
#2 ·
It may be "baked", i would try to put the filter all the way on and wiggle it off. IMO
 
#4 ·
Once you get it apart be prepped with the right tools and willing to spend a good deal of time getting that dam self-welding metal gasket completely cleaned off.
 

Attachments

#5 ·
Ugh yeah...did this the other day...wasn't prepared for that gasket!

I pulled mine in response to the oil cooler lines. Cooler line hookup to the oil filter adapter was galled on the stud...had to pull it and cut everything apart.

But yeah, as mentioned above just the two bolts hold it on. You can get the gaskets from Auto Zone...they come included in a universal assortment.
 
#6 ·
After I posted this I realized if I just put the oil filter back on and hit it with a rubber mallet it should come off.

Did anyone put any RTV sealent on the adapter when they
reinstalled the adapter?

Thanks for your input.


Mike
 
#8 ·
Just be careful if using a hammer not to crack the adapter.... On my first 9C1 I had a local shop replace a bunch of gaskets and seals, and when I got 3.5 hours drive away, the hairline crack in the adapter let loose and she started pumping a lovely stream of oil on the road... Luckily I saw it and shut it off in time..
The mechanic drove 3.5 hours that night to pick up my car and haul it back, he replaced it with a new one for free and didn't charge me for anything other than the initial bill... THAT was service. It was over 7 hours just in driving time alone..
Jonathan
 
#10 · (Edited)
18 Months Later -

Sorry. Answer: No. I noticed mine leaking only after resealing leaking china walls. I spent a couple hours (beer contributed to required patience) to get perfectly clean as the pic showed. The tools shown each got used several times throughout. Some guys here reporting it spalls clean off with a sharp rap with a chisel - but not my experience.
 
#12 ·
I used one of those refinishing cookies on a right-angled air grinder to sneak up in there. It was a pain but 5000 miles and no leaks. I did not use any RTV.

Also, you may know this already, but you'll need a new style of filter, for me it was whatever crossed to a fram PH30.
 
#14 ·
I used one of those refinishing cookies on a right-angled air grinder to sneak up in there.
Same here, and the job was a whole lost easier than trying to scrape with blades. You can get them inexpensively at Harbor Freight.
 
#16 · (Edited)
I used a wood chisel and very carefully pryed it off in chunks.

AND I CAN'T PUT CAREFULLY IN BIGGER WORDS. It worked wonderfully and I cleaned up the sealing surfaces with steel wool and I had no scratches. Took me about 15 minutes to get the surfaces sparkly clean!

The gasket was as hard as could be and was not coming off with the razor blade I was using. I got my chisels from harbor freight and I used the quarter inch wide one. In all I could do this job in about an hour and half or so if I had to do it again. Mr speedy could do it faster I'm sure, but I don't want any more leaks than I have.

Sent from my SM-N910V using Tapatalk
 
#18 ·
IMHO I would NOT introduce any kind of powered grinding tool to remove the hard gasket as the risk of corrupting the surface of the adapter is...about guaranteed

Just use a gasket scraper and work around edge...it comes off
 
#21 ·
My thoughts exactly. I'll try scraping it first. Hopefully it comes off easy. The new gasket seems to be metallic and quite stiff. Is it coated with paper or something?

I think by "refinishing cookie" he was referencing Post 4 - 1st Picture - 3rd item over from the left. Think its a wirebrush ball kinda thing you put in a drill but could be too aggressive. A Scotch Brite type of material is a better option.

Think it was mentioned in this thread somewhere about using Permatex Gasket Remover. This stuff really softens up the material and makes it easier to scrape off. It comes in a Aerosol Can and you spray it on the gasket to soften it up. Just use some paper towels in the opening(s) and clean it up with some wipes and then brake cleaner to get any leftover residue. I used this stuff once on very STUBBORN Water Pump Gaskets and it worked great!
The new gasket seems to be metal. Will the gasket remover still work? Seems like metal would be impervious to a solvent but I've been wrong before.

They have scouring pads that are like 2 or 3 inches in diameter that attach to an adapter for your drill. They have a bunch of different grits for them. I use the lightest, and it polishes the surface and basically removes no material(polishing removes material technically).

I've checked flatness of parts after scouring them and they show no light passing through, basically guaranteeing true flatness. I use the hecky darn out of my scouring pads!

Sent from my SM-N950U using Tapatalk
Ill keep this in mind in case i mar the surface with my screwdriver. I don't see being able to get a razor under the gasket but ill try that first and move to the screwdriver.

Has anyone tried heat? I do have a torch.

Thank you all!
 
#20 ·
They have scouring pads that are like 2 or 3 inches in diameter that attach to an adapter for your drill. They have a bunch of different grits for them. I use the lightest, and it polishes the surface and basically removes no material(polishing removes material technically).

I've checked flatness of parts after scouring them and they show no light passing through, basically guaranteeing true flatness. I use the hecky darn out of my scouring pads!

Sent from my SM-N950U using Tapatalk
 
#22 ·
I did the gasket swap and my oil pressure did not change according to the gauge on the dash.

The rubber outer gasket was an orange ring that either was squared off on the mating surfaces or became that way from being installed for so long. My guess is it came like that and was not the right ring, contributing to a leak.

The inner gasket was mostly stuck to the adapter itself so removal was not too difficult. I was able to get the adapter mating surface almost perfectly clean and smooth.

There were a few spots from the inner gasket stuck to the block that were very hard to remove and I honestly didn't get the block surface perfectly clean but it was about 90% clean and flat. I ended up using a round wire brush and 90 degree air grinder and they still would not come off. But the surface was otherwise shiny and looked nice.

I used permatex high tack gasket sealer on both sides of the new inner gasket. Not sure of this was a good idea or not. Had the sealer, figured I should use it.

So far no leaks but I only ran the car for a minute to make sure it started and no problems or codes occured. I ended up pulling the o2 sensor apart during the swap and i put the wires back incorrectly so the CEL came on at first start. After I put them back correctly the CEL did not come on.

I will report back after I go for a drive to see if it still leaks. Im confident the adapter will not leak at this point, so a leak means it's eithe the china wall or rear mains. Doing my compressor and AC lines tonight and will take it for a recharge tomorrow so I will know then.
 
#23 ·
I did the gasket swap and my oil pressure did not change according to the gauge on the dash.
The socalled 'gauge on the dash' is basically just a switch which merely moves right of center if it registers least 5-10psi or more, but it has no measurement resolution whatsoever beyond that.
Unless you've a 9C1, whose oil pressure reading actually has resolution between 0psi & 80psi.
Those of you who've upgraded from the civilian oil pressure 'detector', to either the 9C1-type, or the 60psi mod, have already verified what I'm saying.
 
#25 ·
[Quote Mendonmafia]".... so a leak means it's either the china wall or rear mains."


Yours may be a post earlier where I volunteer that china walls are a million times more probable than rear main. I've posted pretty impressive pics of mine after it was just 10 years old and the 'funny yellow rtv' had pretty much vanished. So, I've got an even better sell; since the intake is a 'regular maint. item', then if you haven't done the intake in 10 years, --- (and even moreso if NEVER done since new) then it's overdo anyway. And when you have that PM thing out of your hair, and any other leak can stand on its own merit.
 
#26 ·
Yours may be a post earlier where I volunteer that china walls are a million times more probable than rear main. I've posted pretty impressive pics of mine after it was just 10 years old and the 'funny yellow rtv' had pretty much vanished. So, I've got an even better sell; since the intake is a 'regular maint. item', then if you haven't done the intake in 10 years, --- (and even moreso if NEVER done since new) then it's overdo anyway. And when you have that PM thing out of your hair, and any other leak can stand on its own merit.
Yes I believe that was me. Not sure when the intake gasket was last done, but upon further inspection when I was doing the filter adapter, the back of the engine block did seem quite dirty but no signs of fresh oil. My guess is it was leaking then it got fixed but not cleaned.

If it continues to leak oil I will just do the intake and rear mains when I pull the engine for a rebuild.

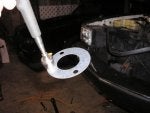
Right now the engine is suddenly running awfully. Just cleaned and oiled my air filter, had the ac recharged, and did the filter adapter seals but even with the ac off it still runs like garbage so im ruling the AC out. I did spray all around the engine with brake cleaner to clean up the mess I made with AC compressor oil/dye. Maybe I ruined something by doing this?

On the way to get the AC system charged it seemed to run fine. It wasnt until about halfway home that it started to act up. Im hoping its the oxygen sensor connection since I had an issue with this after the filter adapter swap. Also the knock sensor wiring somehow became stripped off, so hopefully it's just shorting on something? I noticed this after I removed that metallic like tape during the oil filter adapter gasket swap since it was all about peeled off anyways and totally soaked in oil.

The check engine light is off for now.

I did find one plug wire that was not completely seated on the opti on the side of the engine that seems to have the issue (might be both though) but I haven't had a chance to see if this was the culprit. Based on how little the wire moved and that the issue started later in my drive, I doubt this wire is the issue. At idle the driver side exhaust has a periodic (but not on a perfect cycle) mild sputter. Under throttle in park it sounds normal. Under heavy throttle in gear it nearly bogs out and has awful acceleration and sounds terrible. Under light throttle it sputters pretty bad and bogs a bit and you can feel some surging.

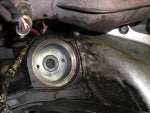
Before I did the AC, oil filter adapter, and air filter, I recently (<500 miles) replaced the opti, I was getting code 36 and 42 which vanished after the opti swap. I used a cheapo amazon unit with 3 year warranty. Maybe it's dieing? It is super hot (nearly 100 F) today. I installed an MSD cap and rotor and applied RTV to all the seams and blue locktite to everything. I also did the opti and water pump seals in the timing cover, water pump, plugs, and wires at the same time. I used 10.5mm Busidin silicone wires off amazon and double platinum bosch plugs. It was running great after these repairs/swaps. Might make a new thread to address this. Sorry to hijack this one lol